Print a big cutout on your home printer
Cardboard cutouts make a setup themed and impressive. You don't need a large-format printer: choose the size and Eleira splits the image into A4 or A3 sheets you put together in your studio.
Free for decorators in Eleira Studio — on the free plan too · Your image stays on your computer
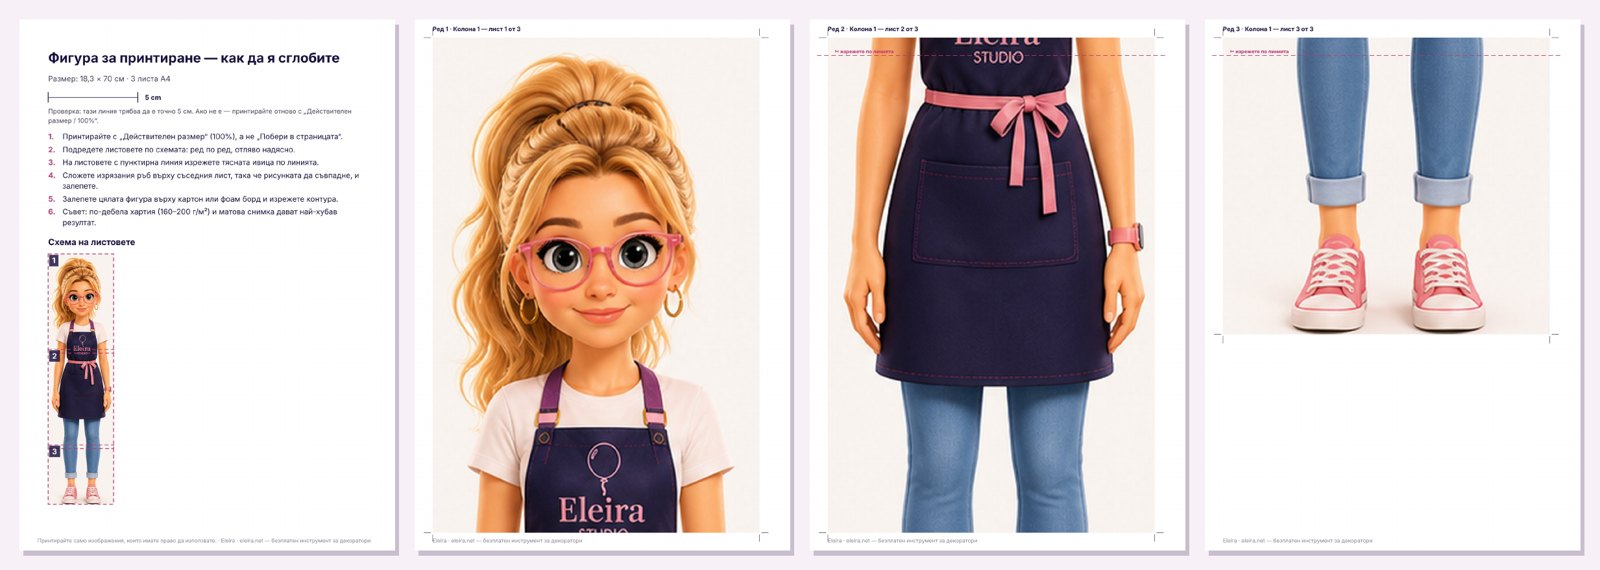
What you get
Exact size
Choose the height — 50, 70, 100 cm or whatever you need. The width is worked out for you.
A4 or A3
Eleira lays the sheets out so you need as few as possible.
Cut and glue lines
An overlap for gluing, dashed cut lines, a number on every sheet and an assembly layout.
Quality check
If the image is too small for the size, you see a warning before you waste paper and ink.
How it works
Upload an image
A fairy, a mushroom house, an animal, a sign — any good-quality image. Nothing is uploaded: it all happens in your browser.
Choose the size and paper
For example 70 cm tall on A4. You see how many sheets it takes and whether the quality is enough.
Download the PDF and print
Page one has instructions and a 5 cm check line. Then the numbered sheets.
Put it together
Lay the sheets out, cut the strips along the dashed lines, glue, and mount on card or foam board.
Practical tips
- Print at "Actual size" (100%). With "Fit to page" the sheets won't line up.
- Thicker paper (160–200 gsm) curls less and the colours are richer.
- For a 70 cm cutout, look for an image at least ~2000 pixels tall.
- Mount on foam board or stiff card and cut the outline with a craft knife — a thin white border looks more professional.
- Glue a card stand on the back so the cutout stands on its own.
Only print images you have the right to use — your own, bought, or freely licensed.
And more in Eleira Studio
Soon you'll also place cutouts in the Visual Studio — next to balloons, panels and stands, with the exact balloon count and a quote with the picture.
Create a free account